Friday, October 31, 2014

I Don't Do Pockets

 
This may sound odd coming from someone with a penchant for making bags and purses, but I’m not a fan of pockets. It’s not constructing them that bothers me: it’s using them. Pockets are supposed to enhance my organization, but the opposite happens. Anything that I store in a pocket is likely to be immediately forgotten, and I will be unable to retrieve that lip balm or nail file when the need arises. (The same phenomenon happens with my freezer. It’s the Bermuda Triangle of food storage. Pity the chicken breast that gets put in there, never to be retrieved!)

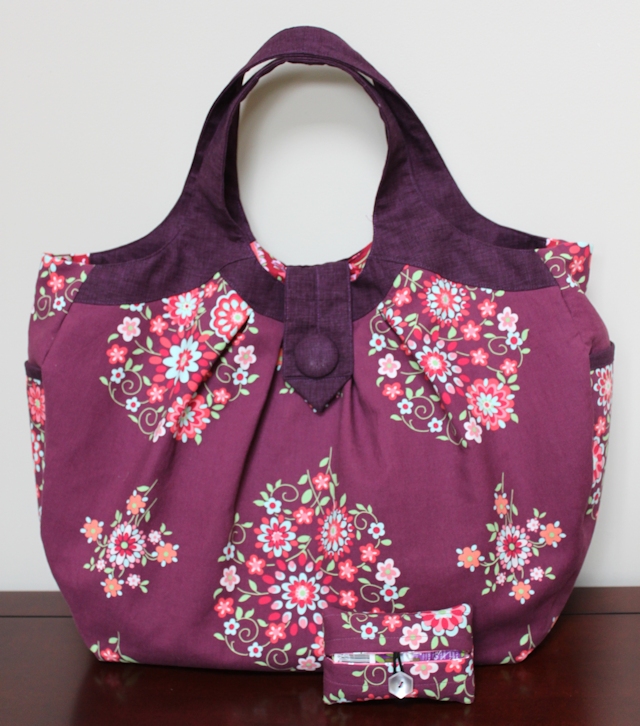
My solution is pouches—pouches for loose appointment cards and receipts, lip sticks and pens. So when I saw that Kim, of Leland Ave Studios, posted a tutorial for a quilted pouch for tissues, I added it to my sewing to-do list. Having one on hand will increase the likelihood that I can find a clean tissue when I need one!

This is an easy-peasy project. The instructions are clearly written and accompanied by many helpful pictures. I started by sewing just two tissue holders, to match some bags I made recently, and foresee making more. I may take the assembly-line route and churn out another half-dozen.

Amy Butler’s Cosmo Bag, blogged about here

My other option involves a contraption you may be familiar with. I am now the proud owner of a darning foot and other accessories related to free-motion quilting, and I’m not quite sure what to do with them yet. Overcoming my fear of FMQ will definitely involve practicing on some throw-away quilt sandwiches, but I could also use these tissue holders as an opportunity to have a go at some loops or swirls.

Lazy Girl Designs’ Mini Miranda Bag, blogged about here

Do you have any words of advice for a FMQ newbie? How about tutorials or videos you recommend I read or watch before I take the—gulp!—plunge? I’d love to hear your words of wisdom on this front. Thanks!

Linking up to Finish It Up Friday, TGIFF at anliN-Nilya, Fresh Sewing Day at Lily’s Quilts, and Sew Cute Tuesday ...

Follow on Bloglovin

Thursday, October 23, 2014

Pour Yourself a Cup of Truth Tea

In progress: Looking Glass

My latest quilt top is something I’m testing for Cheryl Brickey, of Meadow Mist Designs. It’s her Looking Glass quilt, a charm- and layer-cake-friendly design that I’m making in the lap size for my sister for Christmas. (My sister has been sworn away from my blog for the remainder of the year. It’s not difficult for her: my family, except for my mom, stinks at keeping up with my quilty online endeavors—punks!)

I’ve sewn another of Cheryl’s designs in the past: her Candy Circle quilt. I can tell you from that experience that she’s a great pattern writer. She’s an engineer by profession. I’m married to an engineer, and engineers are hardwired to be detail oriented and methodical. These are desirable characteristics in pattern writers. These same characteristics can be a little maddening in a husband. (I guess I’ll hear it if my better half actually reads this post—ha, ha!)

So here’s my conundrum and the cause for our tête-à-tête over truth tea: I’m not digging what I’ve done so far. It’s not the design. I like the chunky feel to Looking Glass. This quilt allows the fabric to take center stage.

But my color palette is all over the place. I bought a layer cake of Bonnie Christine’s Winged from Southern Fabric and edited out those fabrics with light-colored backgrounds; they wouldn’t show up against the Kona Snow I had selected for the sashing. Then I added some coordinating solids from my stash. The result includes light teal and medium teal, deep eggplant, salmon, and pale coral. And then there’s gray and aqua and some hints of yellow.

Three selections from Bonnie Christine’s Winged

Now that I see the blocks almost done, I think it’s too much. If I could do it over, I’d start with a more cohesive palette, like what Cheryl is doing with her second Looking Glass. (Of course, I could do my project over, but I’m not willing to spend the next two weeks ripping out seams.)

Three of the five rows I have (almost) together, with 2.5” of sashing

The next step in Cheryl’s instructions is to finish the five rows and then sew them together with 2.5” sashing. An alternative that I’m toying with is presenting three rows of blocks on the quilt front and two rows of blocks on the back, all with thick strips of Kona Snow in between.

Here are two rows with a bigger chunk of Kona Snow between them

Do you have any thoughts on those two options? How about any other avenues I could take? Take a big swig of that truth tea and give it to me straight. Thanks!

Linking up to Needle and Thread Thursday, WIP Wednesday, and Let’s Bee Social ...

Follow on Bloglovin

Thursday, October 16, 2014

Tutorial: The Tree Is Trimmed


Read the introduction: Quilty Cross-Stitch Blocks

Fabric Requirements

4 colored jelly-roll strips (I used Basic Grey’s 25th and Pine)
9 solid jelly-roll strips (I used Bella Solids in natural)
3” x 4½” piece for the trunk
⅛ yard of fabric for binding
25½” x 29” piece of fabric for back (this provides approximately 2” of overhang on all sides)
25½” x 29” piece of batting
Thread to match

Finished size: approximately 21½” x 25”
All seams are a scant ¼”

Cutting: The Cross-Stitch Blocks
 

Cut the selvages off all the jelly-roll pieces.

Take the 4 colored jelly-roll strips, and cut them all at the 20” mark. Set aside the 4 longer strips (the ones that are about 22” long).

Take the (4) 20” strips. Cut them in half length-wise, making 2 strips that are 1¼” wide. Then cut those thinner strips into 3¾” pieces. Each 20” strip will yield (10) 1¼” x 3¾” pieces. These are the main arms of the Xs. You will have a total of 40 of them.

Take the 4 longer colored strips that you had set aside. Cut them in half length-wise, making 2 strips that are 1¼” wide. You will have a total of 8 of them.

Take 8 of the 9 solid jelly-roll strips, and cut them at the 20” mark. Set aside the (8) 20” strips and the uncut 9th one. We will use them later in the tutorial for the background.

Take the 8 longer solid strips. Cut them in half length-wise, making 2 strips that are 1¼” wide. You will have a total of 16 of them.

Hint: Before working with jelly-roll strips, I like to press them with a little starch. That way, I can make sure they’re straight before cutting them, and the starch makes the long, thin pieces more manageable to sew.

After pressing jelly-roll strips and before cutting them, I like to double-check their width; sometimes, they’re a bit wider than 2½”. For the steps above, I made sure the colored strips were 2½” before cutting them length-wise. I didn’t bother doing that with the solid strips because we’ll be trimming off a bunch of that fabric later on anyway. 

Sewing: The Cross-Stitch Blocks

Take the (16) 1¼” solid strips and (8) 1¼” colored strips. Sew a solid strip, length-wise, on each side of the 8 colored strips. Press the seams toward the colored fabric.


Cut each of the strips from the previous step into 2” pieces. These are the side arms of the Xs. Each of the 8 colored strips will yield 11 side arms. You only need 10 from each strip for this project. You will have a total of 80 side arms.


Hint: Instead of lining your ruler mark with the edge of the solid fabric, line it up with the seam between the solid fabric and colored fabric. Doing so will make more accurate Xs.

Take the (40) 1¼”x 3¾” main arms, and sew a matching 2” side-arm piece on either side. Do this by first centering a side arm on the main arm, pressing the seam toward the colored fabric, and then matching the second side arm’s placement to the first. Press the second seam to the colored fabric.


You will have 40 untrimmed blocks at the end of this step. Cut those 40 blocks to 2½” squares.


Hint: I use a 6½” square to trim these blocks. I find that I have more control over the fabric if I use a 6½” square instead of, say, a 2½” square. Also, I like to line up the 1¼” marks on my square with the intersections of the X’s arms.


Sewing: The Rows of the Tree 

Arrange the cross-stitch blocks into rows like the photo below.


Once you’re satisfied with the placement of your fabrics, sew each row together. Press the seams on the odd-numbered rows one way and the seams on the even-numbered rows the other way. To avoid bulk in your seams, I recommend pressing the seams open.


Sew rows of the same length together. That is, sew the (2) 2-block rows together. Sew the (2) 4-block rows together, etc. Press seams to one side. Again, I recommend pressing the seams open.


Cutting: The Background Fabric

Take the 1 uncut solid strip and the (8) 20” solid strips that you had set aside during the initial cutting. You will use these in the background. Cut the 1 uncut strip in half vertically, giving you 2 strips that are approximately 22” in length. Sew the remaining 8 strips length-wise into 4 pairs. Then cut those 4 pairs into the following lengths. To avoid running out of fabric, start by cutting the 10” strips first, then the 9” strips, and so on.

(2) 10” x 4½ strips
(2) 9” x 4½ strips
(2) 7” x 4½ strips
(2) 5” x 4½ strips
(2) 3” x 4½ strips

Hint: Instead of lining your ruler mark with the edge of the fabric, line it up with the seam to make vertical cuts. Also check the width of these strips: each one should be 4½”; you may need to trim a little bit off.

Sewing: The Background to the Tree

Now you have all the pieces for the quilt top. Arrange them as shown in the picture below. (Heads up: I cut the 10” x 4.5” incorrectly for the photo below. The pic is off in that regard, but the measurements are right.)


Working row by row, sew the background pieces to the cross-stitch blocks and the background pieces to the tree trunk, being sure to line up the middle of the tree trunk with the seam between the 4th and 5th cross-stitch blocks in the bottom row of the tree. Press seams open.

Sew the rows together length-wise. Press seams open.

Square up your quilt top.

Finishing the Project

Quilt and bind your project as desired. I use Jaybird Quilts’ Single-Fold Binding Tutorial.

If you plan on hanging your quilt, a good reference is Stitched in Color’s tutorial: How to Hang a Mini Quilt.

To see this mini quilt in Basic Grey’s Evergreen line, view the same tutorial at the Moda Bake Shop.


Follow on Bloglovin

Quilty Cross-Stitch Blocks

Jump to the tutorial: The Tree Is Trimmed

Cross-stitch blocks have been popping up on blogs over the past few months, and I love, love, love them. The quilt that first got my attention was Mr. Fox, by Samantha, of Making Life Prettier. More recently, I’ve swooned over this blue border of cross-stitch blocks, by Jess, of Quilty Habit.

Pile O’ Fabric features a tutorial for those interested in making their own cross-stitch blocks. I haven’t given it a go, but I definitely will: it’s versatile, offering instructions for 1-inch cross-stitch blocks up to 6-inch cross-stitch blocks.

The Pile O’ Fabric approach looks as if it’s especially good for quilters who want to use a bunch of different fabrics and create a scrappier feel to their collection of cross-stitch blocks. What if I chose to use fewer fabrics (because I wanted to justify buying a new jelly roll instead of breaking into my scraps) and took more of an assembly-line approach to making these blocks (because chasing after two little monkeys seriously cuts into my crafting time)?

With those thoughts in mind, I bought a jelly roll of Basic Grey’s 25th and Pine and came up with a different plan of attack. Right now, I’ve used this method to make a table topper. I also have a wall hanging and a table runner in the works. Even after those two projects are done, I’ll still have enough jelly-roll strips to continue the fun.

For more on how to make your own cross-stitch blocks from jelly rolls, see my tutorial: The Tree Is Trimmed.

If you’re visiting from Le Challenge, this is my submission for the “mix” theme, which I interpreted as “mixed up.” Do you see it? I’ve made a “cross-stitch” table topper, but I made it out of fabric, not embroidery floss! I also have a “quilt” that I’m making out of embroidery floss, not fabric. It’s Little Miss Shabby’s Quilty Stitches project. I suspect it will be ready by October 15 ... of next year. : )

http://www.le-challenge.blogspot.com/2014/10/le-challenge-16-mix.html

Also linking up to the usual suspects, including Needle and Thread Thursday, TGIFF at Simply Pieced, Finish It Up Friday, Sew Cute Tuesday, Let’s Bee Social, and Fresh Sewing Day at Lily's Quilts ...


Follow on Bloglovin

Tuesday, October 7, 2014

Q4 Finish-Along

After my triumph of completing the four third-quarter projects I set out to tackle back in July, it’s time to assess my WIP list and think about what I can accomplish by year’s end. (What? You have no idea what I’m talking about? Check out the scoop on the finish-along at the Littlest Thistle and consider playing along.)

This time of the year is tricky, though. I have some super-secret Christmas gifts in the works, and I can’t divulge those details until after the holidays. Well, here are four projects that I can make public right now and hope to wrap up before we welcome the new year …

Amy Butler Pattern and Fabric

I scored this home-dec fabric from Amy Butler for $5 a yard. I think it’s a great fit for the Reversible Everyday Shopper, found in Amy Butler’s Style Stitches. While you’re making heartfelt gifts for your family and friends, I’ll be sewing this for me.


Super Tote

Who needs another bag? I do. That’s why I plan to transform this Deco Floral fabric, from Elizabeth Olwen, into a Super Tote.


Rail Fence Quilt

This rail fence quilt has been progressing at snail speed. (Perhaps that’s fitting, given that the fabric selection includes mustardy snails from Rae Hoekstra’s Lotus Pond line.) I pulled the fabrics in July. I started sewing at the end of September, missing both Stitched in Color’s Purge deadline and the 100 Quilts for Kids deadline. Can I finish by December 31? I’m banking on slow and steady winning this race.


Christmas Table Topper

When I started my Christmas table topper, Christmas was months and months away. I was ahead of the game and feeling pretty darn good about it. Fast-forward to today, and I can’t remember the last time I touched this project. Eek! T minus 78 days until Christmas!


I’m gearing up to end 2014 with a big quilty flourish. How about you? List your goals at the Littlest Thistle, and I’ll cheer you along!


Follow on Bloglovin

Monday, October 6, 2014

Birds of My Neighborhood

I am 15 months into this adventure called “learning to quilt,” and here’s how things stand right now ...

I love picking out fabric and colors. I love piecing—regular old piecing, applique, foundation piecing, you name it. I love admiring my completed quilt tops, all nice and flat and ready to be joined to the batting and backing. But the quilting itself? I’m starting to think that part of the process is for the birds.


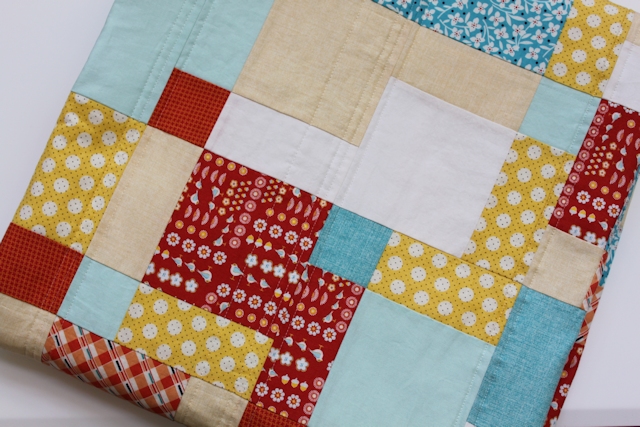
Take my latest quilt. I’m calling it the Birds of My Neighborhood (an appropriate name given my feelings about quilting, n’est-ce pas?). It started as a way to introduce two friends to quilting. As a disappearing nine-patch, its construction was easy, and its versatility meant that the three of us could work in different fabrics and different layouts and come up with something unique to each of us.

I looked to Bonjour Quilts for my inspiration. Kirsty’s take on the disappearing nine-patch trades a predictable block layout for placing chunks of the same fabric next to each other. The result is modern, and paired with her straight-line quilting that follows the grid of the pieced blocks, it’s lovely.


My version was a breeze up until the quilting. I took the standard precautions to get a smooth finish to my quilting: I spray-basted like a pro, ensuring that seams were straight and the quilt top was flat. I started quilting each line in the center of the quilt, meticulously burying the ends (a process—get this, Audrey!—I’m starting to enjoy) and working toward the edges. But soon after starting to quilt, things weren’t looking good.

If I had taken a picture of the quilting—which of course I didn’t because the project was driving me crazy and I hardly wanted photographic evidence of my heartache—you’d see big puckers where the horizontal and vertical quilting lines met. Under it, you’d see a caption that would read, “BAH!”

Instead of pulling the quilt off my machine, setting it aside, and regrouping, I forged ahead. I was 16 or 17 lines into the quilting before I came to my senses. It took many hours to rip out all of that work.


Then I did what everyone does when a quilt project is driving her bonkers, right? I made a bag.

And then I did some reading online. (BTW: there’s a great rundown of straight-line quilting on the Modern Quilt Guild’s website.) I went to a local quilt shop, bought some fabric, and chatted up the owner.

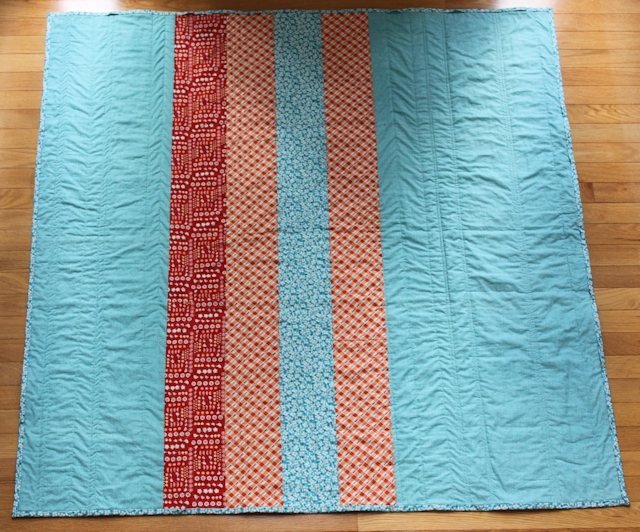
When I got back to my machine, I monkeyed with the presser-foot pressure. (Admittedly, I didn’t know what that knob did before this incident, but in my defense, I wasn’t able to adjust the pressure on my previous machine, which I sewed on for 10-plus years before graduating to my current Janome.) Less pressure seemed to remedy the puckering problem I had experienced. Yay! Too little pressure, however, prevented the walking foot from grabbing the quilt sandwich effectively. I got to a happy medium with the pressure and started quilting all over again. This time, I just went for vertical lines of quilting; I wanted to minimize any chance of having to pick more stitches. I’m pleased with the result.


The moral to this story? If you follow me, you know this is a conclusion I’ve come to before: I need a new machine! I’m with Rachel, of Stitched in Color, on this one: the machine can make all the difference. I really like my Janome, but it’s billed as a home-dec machine. I do my fair share of home-dec projects, but as a quilter, I want more space to the right of my needle. I want to quilt without attaching a walking foot. I want to do the basics of quilting well, and I think my Janome is holding me back.

Thankfully, it didn’t hold me back from achieving my fourth and final third-quarter goal. Birds of My Neighborhood quilt—check!

OK, kids, how did you all do with your Q3 goals? If you have zero idea what I’m talking about, check out the Littlest Thistle because Q4 goals are due this week!

Postscript: Birds of My Neighborhood is the 1998 release from one of my favorite bands, the Innocence Mission. If you like folksy music with chick vocals, give them a listen.: )

Linking up to Sew Cute Tuesday, Let’s Bee Social, Needle and Thread Thursday, TGIFF at Quilt Matters, and Finish It Up Friday ...

Follow on Bloglovin