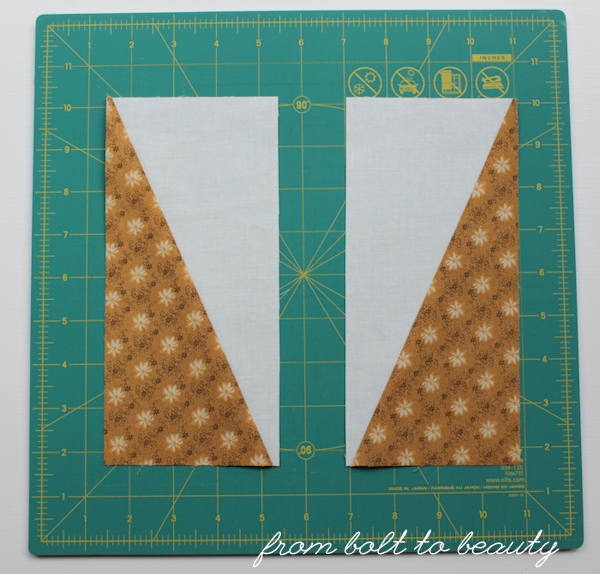
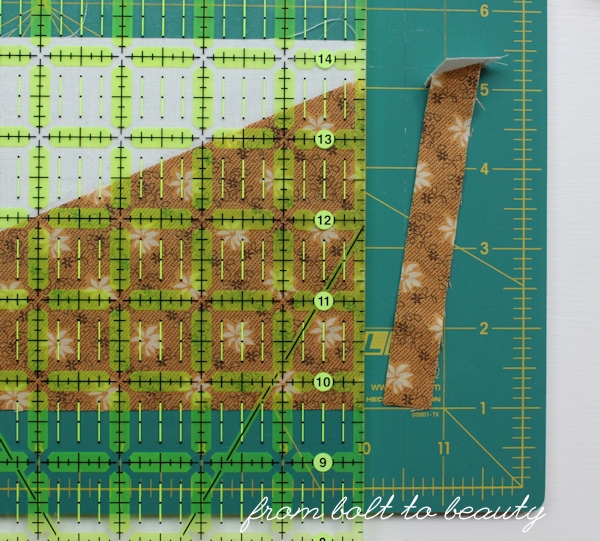
Wednesday, September 30, 2015

Gadgets, Gizmos, and Glue

I don’t often fall victim to the latest gadget trend. Plenty of sewing gizmos have come and gone without garnering any attention from me. There are a few, however, that I have found are worth the money. What follows are the items I’m become most reliant on in the past year—and a few I’m still undecided about.

Olfa Spinning Mat


My favorite tool purchased in the past year is my rotating Olfa mat. One night at guild, a friend was extolling the virtues of her spinning mat. I was at Joann’s the next day and saw that all mats were 50 percent off. Clearly, this was fate. I needed one. 

I really like mine. It’s compact—just 12” square—and works well for the fabric I cut on it, which is small blocks that require precise cutting. Plus, my sewing table is often cluttered with other stuff. It’s nice to rotate a block without moving my full-size cutting mat, moving to the other side of the table, or tidying up.

Chalk and Glues


Sometimes what I have on hand does the trick just fine. That’s what I’ve found with regular old school glue and chalk. I use liquid washable Elmer’s glue for binding. After sewing the binding to the front or back of my quilt (it differs for me based on the project), I use Elmer’s glue to adhere the binding to the other side, avoiding the need for pins or clips, before finishing the binding by machine. Plenty of other people have talked about this process (see, for example, Angela Pingel of Cut to Pieces), so I won’t repeat it here. Glue-basting your binding—and fully attaching your binding by machine, for that matter—is worth trying if you haven’t experimented with it before. (P.S. I’m using the glue stick for basting an English paper-piecing project. I’ll save my judgment until after I have to remove the paper!)

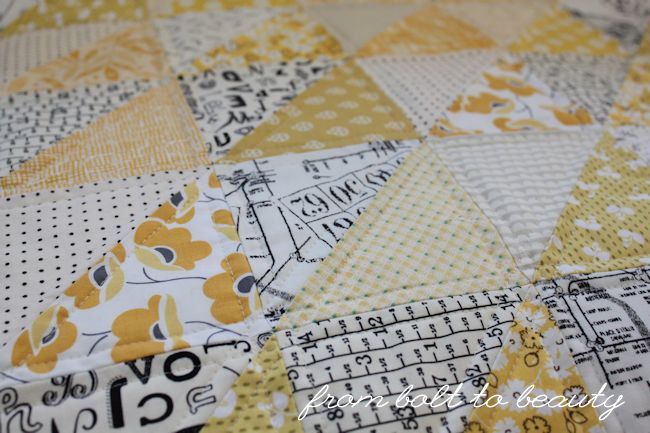
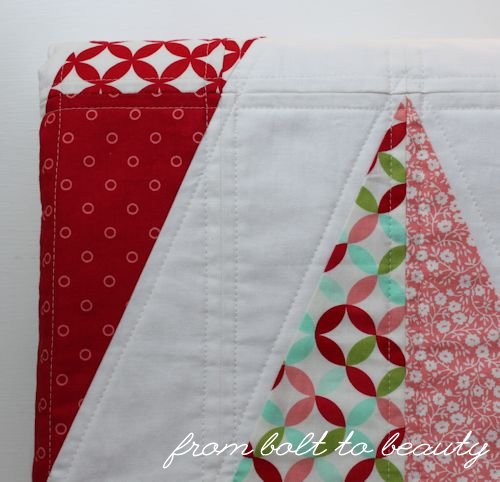
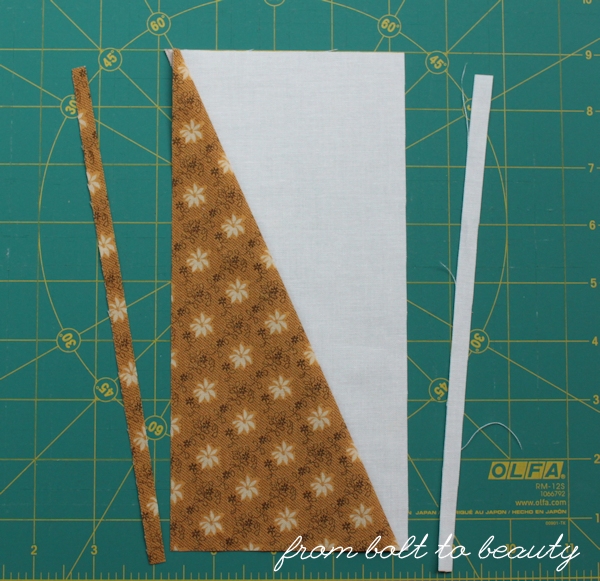
I’ve found school chalk to be useful when marking my quilts for free-motion quilting. (I write this as if, you know, I’m always working on a little FMQ. I’m not. I used it here, where I needed some rough guides for my swirls.) When a project requires more precision or when I’m straight-line quilting, I use the white Chaco Liner from Clover. Its thin point of application ensures that I know exactly where to quilt. (Heads up: I do have a horror story about the yellow Chaco Liner, though. Beware!)

Clover Mini Iron


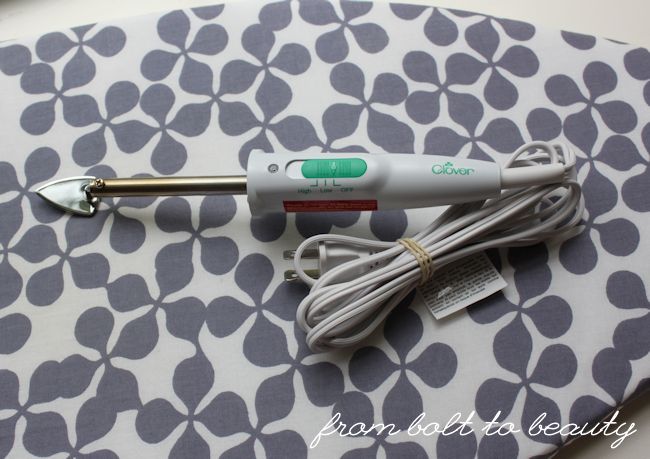
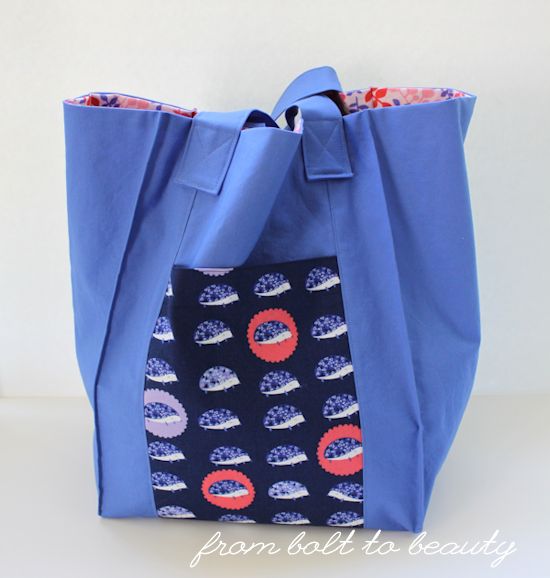
In a moment of weakness, I bought Clover’s Mini Iron to finish up this Social Tote. The jury is still out on this gadget. I haven’t used it since that project, but I also have not been making as many bags as I usually do. I can’t say yet that it was worth the investment.

I can tell you that it’s light, and it gets crazy hot (although it takes several minutes to heat up). I can see how it’s useful in bag making, but if you have one and use it for quilt projects, please share!

Steady Betty

Here’s another gizmo I’m not sold on yet: the Steady Betty. I have the 15”-by-24” version and didn’t bother taking a picture because mine is already marked and ugly. See the Steady Betty site for pics.

The surface of the Steady Betty is heat-proof foam, which means that my fabric doesn’t slide around as it would on my regular ironing board and that I can pin fabric to the pressing surface. Since my full-size ironing-board cover disintegrated in the washer (for real), my Steady Betty has become my only ironing surface. I’m fine with using it to press small bits of fabric or pinning some bias tape to it for pressing, but when faced with an entire quilt top to press, the foam surface makes for cumbersome ironing. 

Are you a gadget buyer? If you have thoughts on any of these products—or have other interesting ones in your sewing arsenal—please share in the comments.

Linking up to Sunday Stash, Let’s Bee Social, and Needle and Thread Thursday ...


Follow on Bloglovin

Monday, September 21, 2015

Bright as Yellow: A Mini Quilt

I cleaned up my sewing space recently and made the most amazing discovery. I found my living and dining rooms.

They’re lovely, lovely spaces, with deep brown furniture and warm yellow walls. The thing is, neither room looks as if it is home to a quilter. I needed to remedy that.

I decided the spot between the two front windows in my living room was a good place to start. A tall lamp lives in front of that wall space, preventing me from hanging a mirror or framed print there, but I thought a mini quilt would work well. Pulling inspiration from my new friend Caitlin’s work, I started making half-square triangles (you might think I’m partial to half-rectangle triangles, but I love making HSTs just the same).

I had been waiting for the perfect project for these low-volume charms.
I was pleased to put them to good use here.

Each one has a yellow half and a low-volume half. I bought the yellow fabrics for a project that I abandoned before I even got going with it (I was going to make this quilt in grays and yellows). The low-volume fabrics were from a charm swap that Chelsea (Patch the Giraffe) and I organized last year. In other words, this mini was made entirely from my stash. Whoopee!

I can spend months on intricate quilting projects, but my favorites tend to be
my more simple fabric endeavors, like these half-square triangles.

I wanted this mini to serve as a backdrop—wallpaper, even—that would anchor the space and the lamp without being a focal point in itself. I think it works.

Bright as Yellow in her official spot in my living room.

Very few projects of mine take this course. I don’t like creating for a specific room. Usually, the throw quilt or mini quilt comes first—and then I determine who will receive it or how I will use it. I think quilting is more fun that way. (One exception is the quilt I made for my mother-in-law, for which I trooped through quilt shops in Massachusetts and New Hampshire with one of her pillows in tow!)

I wish I could use a single-fold binding in all of my projects! I love how the gray
Zen Chic fabric frames this mini.

How about you? Do you do “commissions”—whether they’re real ones that the recipient has a lot of input into and compensates you for or one that you tailor to your own décor?

Linking up to Sew Cute Tuesday, Let’s Bee Social, TGIFF, Finish It Up Friday ...

Follow on Bloglovin

Monday, September 7, 2015

Jolly Bar Blog Hop with the Fat Quarter Shop

Read the Tutorial: Bring on the Dancing Horses

I’m a fan of precuts, especially jelly rolls and charm packs. Using precuts allows me to sample an entire line without buying tons of fabric, and I love a good matchy-matchy quilt as much as I do a super-scrappy quilt. Plus, sewing with jelly rolls or charms cuts down on my cutting time. (I secretly like cutting, but it’s nice to have a shortcut sometimes!)

A recent opportunity to work with a new precut—the jolly bar, sold exclusively by the Fat Quarter Shop—opened up a whole new world for me. Jolly bars contain precut 5” x 10” rectangles. The Fat Quarter Shop provided me a jolly bar of Bonnie and Camille’s new Hello Darling collection and set me loose to do what I wanted with it. Yippee!

I’ve sewed squares and curves and triangles, but I’ve never worked with rectangles. I immediately knew I wanted to design a quilt that would take advantage of that new-to-me shape. This is what I concocted ...


I’m calling this design Bring on the Dancing Horses,* and it features big, big diamonds composed of half-rectangle triangles (HRTs). I made it without the use of a fancy ruler, but I’m so smitten with these triangles that after having made this quilt, I did invest in Bloc_Loc’s HRT set.

The back features fabrics from older Bonnie and Camille lines.

Although I can imagine these diamonds quilted with, say, a lovely figure-eight design, I opted for straight-line quilting a quarter of an inch on either side of the block seams. Then I went back and quilted around the inside and outside of the triangles.

A close-up of the quilting.


I adore the binding. It’s also from Hello Darling.

If you want to sew your own version of this quilt, I documented my process in Tutorial: Bring on the Dancing Horses.

And because I’m an overachiever when it comes to these diamonds, I made a second quilt top, using a jolly bar of Bonnie and Camille’s Daysail. Do you have any suggestions on the quilting? My knee-jerk reaction is to repeat my initial approach, but I’m open to other options.


I will most likely gift the Hello Darling quilt, but I am tempted to keep the Daysail version. Can you blame me? ; )

* “Bring on the Dancing Horses” is a song by Echo and the Bunnymen. No, there are no horses in my quilt design!

Linking up to Sew Cute Tuesday, Let’s Bee Social, WIP Wednesday, Needle and Thread Thursday, TGIFF, and Finish It Up Friday ...

Follow on Bloglovin

Tutorial: Bring on the Dancing Horses

Read the Introduction: Jolly Bar Hop with the Fat Quarter Shop


Fabric Requirements

1 jolly bar of Bonnie and Camille’s Hello Darling or (42) 5” x 10” print rectangles for the diamonds
2 yards of solid fabric for the background
½ yard of fabric for the binding
3 yards of fabric for the backing
55” x 62” piece of batting (this provides approximately 3” of overhang on each side)
Thread to match

Finished size: approximately 49” x 56”

All seams are ¼”. Cutting instructions presume 40” of usable fabric after selvages are removed.

A Word on Half-Rectangle Triangles

Half-rectangles triangles (HRTs) are constructed differently than half-square triangles. With half-square triangles, you draw a diagonal line on one square of fabric, pair it with another square, sew ¼” on either side of the line, and cut on the line. The process results in two half-square triangles, which you can rotate however you like.

You can’t rotate HRTs like half-square triangles. There are left rectangles and right rectangles.

A left HRT and a right HRT.

The pattern that follows includes instructions for both kinds of HRTs without requiring a special ruler. Please note: The pattern uses the entire jolly bar. I recommend that you practice sewing a set of left triangles and and a set of right triangles on scraps first.

Cut the Background Rectangles

From the solid background fabric:

Cut 5 strips 10” width of fabric (WOF). Cut each strip into 5” x 10” rectangles. Each strip yields 8 rectangles for a total of 40 rectangles.

Cut 1 strip 5” WOF. Cut 1 rectangle, 5” x 10”, from that strip. Added to the 40 rectangles cut in the previous step and a white-on-white 5” x 10” print from the jolly bar, you will have a total of 42 rectangles, all 5” x 10”. (If your jolly bar does not contain a white-on-white print, cut another 5” x 10” rectangle from the 5” WOF strip. Later in the pattern, you’ll have an extra 5” x 10” print rectangle.)

Cut 2 strips 8.5” WOF. Cut those strips into 4” x 8.5” rectangles. Each strip yields 10 rectangles for a total of 20 rectangles, 19 of which you’ll use in the quilt and 1 extra.

Plan the Diamonds

Separate your 5” x 10” print rectangles into 8 piles, 1 for each diamond. Refer to the image and table, both below, which spell out the requirements for and placement of each diamond.

D1: 6 print rectangles
D2: 4 print rectangles
D3: 6 print rectangles
D4: 10 print rectangles
D5: 2 print rectangles
D6: 6 print rectangles
D7: 2 print rectangles*
D8: 5 print rectangles

*Note: You will use an extra left triangle from D1 or D2 to complete D7.


Mark the Solid Rectangles

Take 22 of the 5” x 10” solid rectangles. On the wrong side, measure and mark ½” horizontally and vertically from the bottom left corner and ½” horizontally and vertically from the top right corner. Connect the two marks with a diagonal line. In the next step, we will pair each of these pieces to a print and call the pair a left triangle pair (LTP). Sewing and cutting those pieces will result in 2 left triangles (LTs).

Make your diagonal line from
bottom left to top right.
(You will add the print fabric
in the next step.)

Take 20 of the 5” x 10” solid rectangles. On the wrong side, measure and mark ½” horizontally and vertically from the top left corner and ½” horizontally and vertically from the bottom right corner. Connect the two marks with a diagonal line. In the next step, we will pair each of these pieces to a print and call the pair a right triangle pair (RTP). Sewing and cutting those pieces will result in 2 right triangles (RTs).

Make your diagonal line from
top left to bottom right.
(You will add the print fabric
in the next step.)


Mark the Prints and Match to the Solids

To make a LTP, take a solid 5” x 10” rectangle with a diagonal line from the bottom left to the top right. On a print, mark dots at the ½” point horizontally and vertically from the top left and bottom right corners on the right side of the fabric. Place the rectangles right sides together, matching those dots on the print rectangle to the end points of the line on the solid rectangle. Pin.


To make a RTP, take a solid 5” x 10” rectangle with a diagonal line from the top left to the bottom right. On a print, mark dots at the ½” point horizontally and vertically from the top right and bottom left corners on the right side of the fabric. Place the rectangles right sides together, matching those dots on the print rectangle to the end points of the line on the solid rectangle. Pin.


The table below shows how many LTPs and RTPs are needed for each diamond.

D1: 3 LTP, 3 RTP
D2: 3 LTP, 1 RTP
D3: 3 LTP, 3 RTP
D4: 5 LTP, 5 RTP
D5: 1 LTP, 1 RTP
D6: 3 LTP, 3 RTP
D7: 1 LTP, 1 RTP*
D8: 2 LTP, 3 RTP

*Note: You will use an extra left triangle from D1 or D2 to complete D7.

Sew and Trim the HRTs

Sew a ¼” seam on either side of the line on all the LTPs and RTPs. Cut along the line and press seams to the darker fabric. Trim to 4” x 8.5” ...

First, trim equal amounts (a little more than ½”) off both sides width-wise:


Then, trim equal amounts (a little more than ¼”) off both sides length-wise:


It’s worth noting that the seam will not bisect the corner angle as it would in a half-square triangle. Instead, the seam hits the corners at ¼” mark.


Lay out the Diamond and Background Pieces

Lay out the diamond pieces and background pieces, as shown in the image below.


Red indicates a left triangle. Blue indicates a right triangle. White rectangles are 4” x 8.5” pieces of the solid background.

Sew the blocks in the rows, pressing seams open. Join the rows, pressing seams open.

Finish Your Quilt

Cut the 3 yards of background fabric into two rectangles: 1.5 yards x WOF. Sew the two pieces together along the longer side, and trim to approximately 55” x 62”. Quilt and bind as desired.

Linking up to Tips and Tutorials Tuesday ...

Follow on Bloglovin

Saturday, September 5, 2015

Rose, Textile Enemy No. 1

My boys are 5 and 6, and long ago, I declared them the enemies of textiles everywhere. My older son is rough on clothes; it takes about three weeks of his abuse before a new pair of pants presents with a hole in the knee. My younger son is sensory-seeking, so if he doesn’t have something his occupational therapist has deemed acceptable to chew on, he makes do with what’s at hand—like, his shirt cuff or the corner of a pillow. The damage is seen elsewhere in my house: I’ve found the telltale signs of a little nose having been wiped on my couch or an indication that someone was chewing recreationally on the tie to my bathrobe. Recently, when I noticed that my younger son brushed his curtains instead of his teeth one night (it was hard to miss the big, white toothpaste mark on the chocolate-brown fabric), I thought things couldn’t get worse.

And then we got Rose.


Rose is 10 weeks old and 100% puppy. She’s not our first golden retriever, but she is the mouthiest and she loves fabrics. Dishtowels left hanging on the oven door, socks the boys dropped on the floor, my Pottery Barn throw pillows—none of these items escapes her tiny puppy teeth. This, however, was the final straw ...


I should note that I did not reprimand Rose after the fact (there’s no point unless I catch her in the act), but I did give my husband, who took multiple pictures before saving that quilt from Rose’s puppy jaws, a stern talking-to.

I could regale you with other stories of sweet, at times naughty, Rose—stories like Rose vs. Michelle’s Birkenstocks (Rose won) and Rose vs. the Irrigation System (the sprinklers won) and Rose’s Adventures Outside (she doesn’t like simply being in nature; she tries to ingest it). I think these pictures say it all, though ...

Hmmm ... what mayhem can I cook up next?


Mom will never notice!


Being a puppy is hard work. I take a nap wherever I can, even on the vet’s exam table.


Mom, could this face lie to you?

My husband has grand plans for Rose and From Bolt to Beauty. He thinks she’s a great marketing ploy. What’s better than quilts? Quilts and puppies! We’ll have to see about that.

Follow on Bloglovin

Wednesday, September 2, 2015

A Giveaway and a Forgotten Finish

** The giveaway is closed, and the winner is #25, lalaluu. Congratulations! **

Hello and welcome to the 100th post here on From Bolt to Beauty. I want to thank you for reading my musings on all things sewing and quilting. You’ve enriched my hobby by the encouragement, insights, and friendship you’ve offered me in this space. If I had known blogging would be so much fun, I would have started doing it years ago.

My friends and family would also like to thank you. Because you and I can talk about scant quarter-inch seams and single-fold bindings, my husband doesn’t have to hear about them. Because you sympathize when I scorch a project or miscut some fabric, my friends don’t have to feign interest. Because you care to read my posts, my family members don’t have to pretend that they do. (Mom, you are exempt from this judgment. I know that you really do read my posts!)

I think giveaways are crazy fun, so to celebrate the milestone of my 100th post, I’m giving away this fat-quarter bundle of Carolyn Friedlander’s cross-hatch fabrics (17 FQs in all).


This giveaway is open to anyone anywhere in the world. Everyone gets one chance. For that chance, you need to follow me. Please leave a comment, indicating how you keep tabs on me—whether it’s Bloglovin’, Feedly, RSS, Instagram (@frombolttobeauty), stalking me at guild meetings, etc. (Please don’t say that you follow me on Facebook—I’m not on Facebook!) If you’re feeling chatty, you can also share with everyone how writing a blog or reading blogs has influenced your own sewing or quilting.

This giveaway is open through Friday, September 11, at 8 p.m. Eastern Time. I will email the winner and announce his or her name on this post.

Heads up: I noticed a bunch of no-reply bloggers leaving comments. If you’re a no-reply blogger, please leave your email address so I can notify you if you win. Thanks!

And because no blog post is complete without some pretty project pictures, here is a tote I made as an extra for the Lizzy House mini-quilt swap but forgot to post. I used Alicia Paulson’s Jane Market Bag pattern (for the, like, 30th time) ...

Mmmm ... pretty bag with hedge hogs.

Thanks again for reading. Good luck!

Linking up to Let’s Bee Social, Needle and Thread Thursday, TGIFF, and Finish It Up Friday ...

Follow on Bloglovin