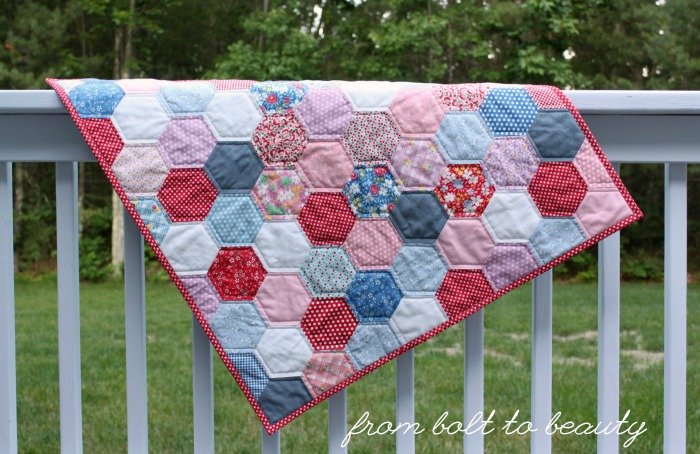
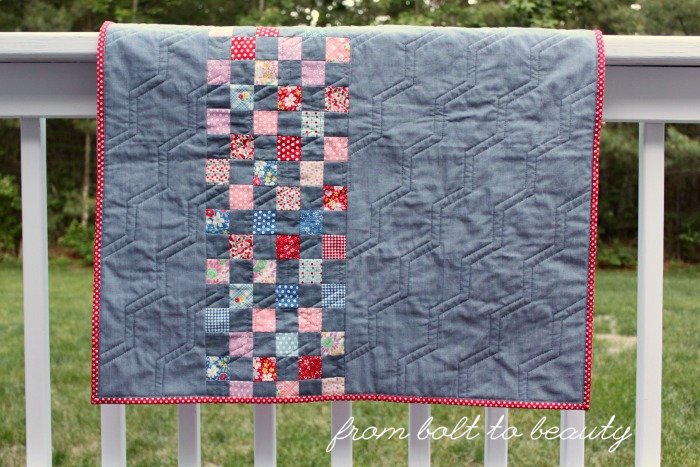
To read more about the finished hexagon quilt, click here.
Earlier this year, I dispelled the myth that partial seams are something to avoid. As it turns out, they’re downright easy. So I was thinking, could the same be said of the dreaded Y-seam?
To see whether I could conquer this technique, I decided to make a baby quilt out of hexagons. I consulted a few tutorials, cut my hexagons, and went for it. After machine-piecing a dozen hexagons or so, I ripped out each seam and started all over again. : (
I decided that if I had more information upfront, with more pictures, I could have saved myself the hassle. Perhaps you learn that way, too? If so, here’s how I pieced my first-ever hexagon quilt, with Y-seams that I’m proud of!
Cut the Hexagons Accurately
I have an AccuQuilt Go! If you’re sewing with hexagons, you do not need a fabric-cutting machine, but since I already owned one, I decided to invest in a hexagon die for this project. This die cuts hexagons in three sizes, and I cut my fabric with the largest of those, the 5-inch hexagon. (I think the smaller sizes would have been too fiddly to work with.)
Alternatively, I could have cut the hexagons with a specialized ruler (like the Hex N More) or have bought precut hexagons.
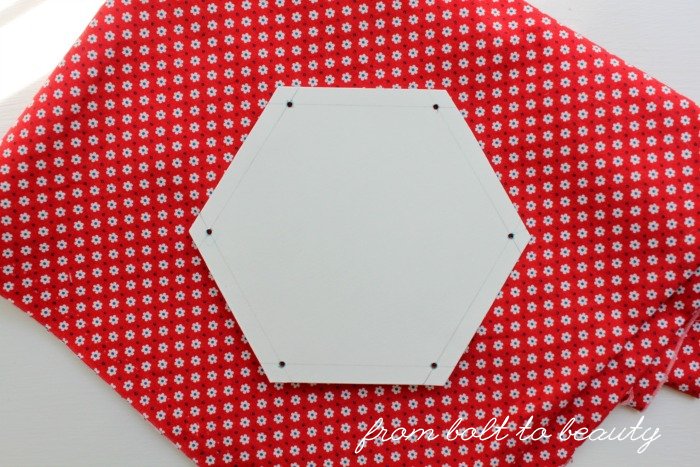
Make a Template and Mark the Hexagons
I made a template for marking my hexagons by running a piece of cardstock through my AccuQuilt GO! (I wouldn’t make a habit of cutting paper with my machine, but I figured doing it once in a while wouldn’t dull the die.) It is the same size as the fabric hexagons I cut. If you hand-cut your hexagons or bought precuts, you could do the same by tracing one of your hexagons onto cardstock and cutting it out.
After you have your cardstock template, draw lines a quarter of an inch from each side and punch a hole at the intersections of those lines. (I used a 1/16-inch hole punch to do that.)
Then, using this template and a pencil, mark the six intersections on the wrong side of each hexagon.
Sew the Hexagons in Group of Threes
The instructions I consulted recommended laying out the hexagons, sewing the hexagons into columns, and then sewing the columns together. I had better luck, however, sewing my hexagons into groups of threes and then sewing those trios to others.
When I’m working with groups of threes, I can consistently sew a nice Y-seam. When I add a group of three to another group of three, I still have good control and produce a beautiful Y-seam. On the other hand, when I’m working with columns, I’m always working with big, awkward chunks of fabric, and it’s harder to get my seams as precise as I would like.
Here’s how to sew these trios together, one seam at a time ...
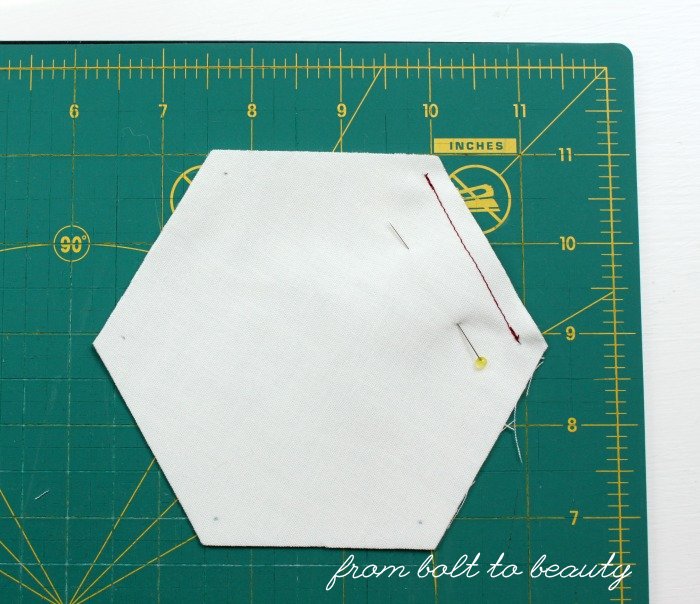
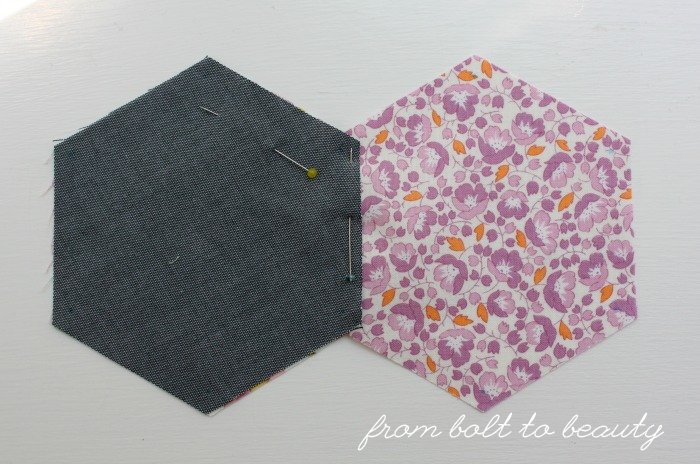
1. After deciding on the layout for your hexagons, sew two adjacent ones together. This entails matching the corners of the hexagons, right sides together, and sewing from one mark to the other on the edges you want to join. Note: If
you sew beyond one of your marks, you’ll be sewing into the seam
allowance, which can cause unpleasant puckers on your quilt top. Also: Sewing hexagons requires sewing on the bias a lot—be careful not to pull or distort those bias edges as you sew them.
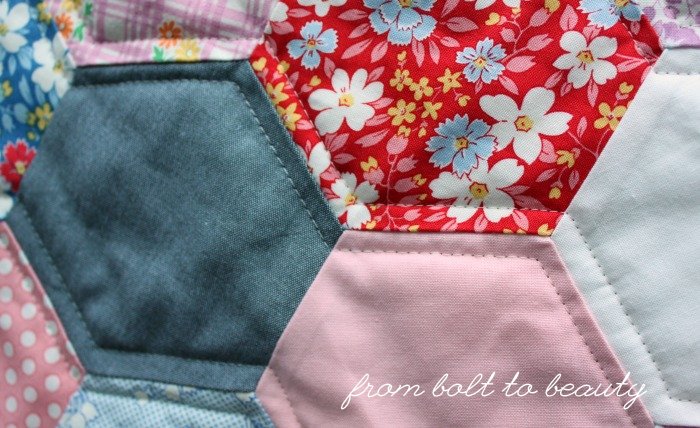
Check out this example that uses dark red thread to show where the seam starts and stops. I used my hand wheel to start precisely on the pencil mark, and I pinned the two hexagons together before sewing. I also backstitched at the beginning and ending of the row of stitches.
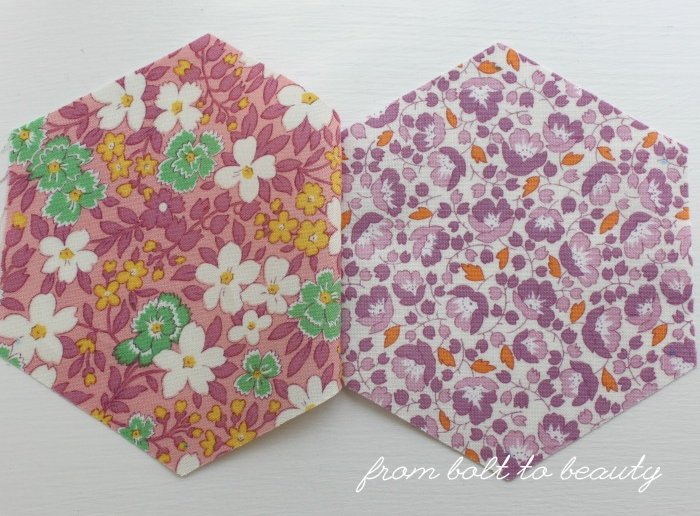
When you’re done with your seam, don’t press it. Your two hexagons (now shown in my fabric of choice for this project) will look like this …
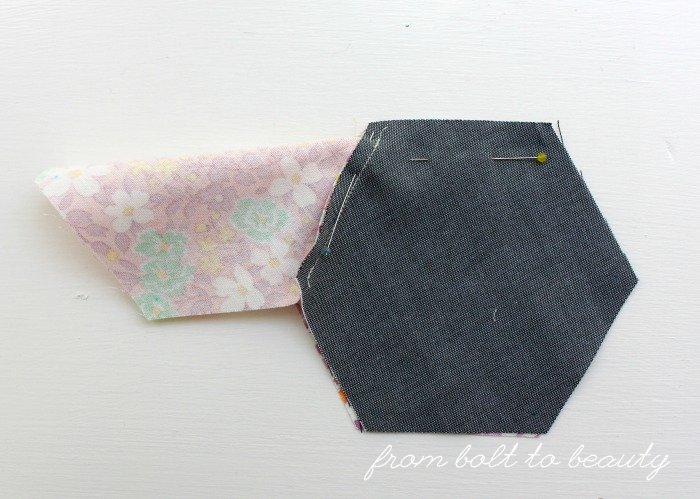
2. Match the corners of the third hexagon with one of the first two hexagons, right sides together.
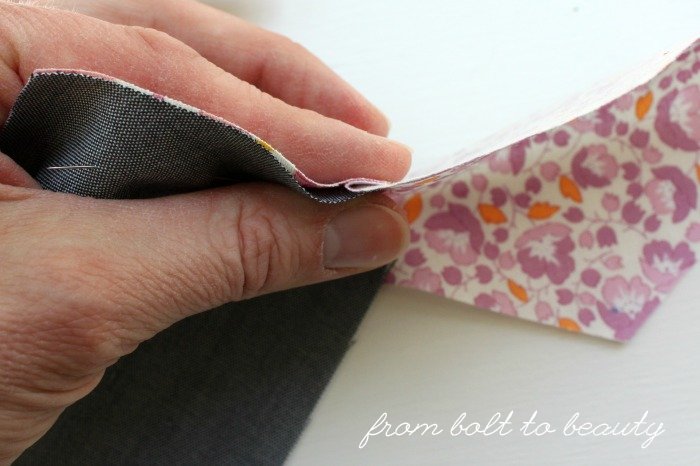
3. Finger-press the first seam out of your way, so you don’t catch it in the seam you’re about to sew.
4. Use two pins, one along the seam you will be sewing and one along the seam allowance you want to avoid sewing into.
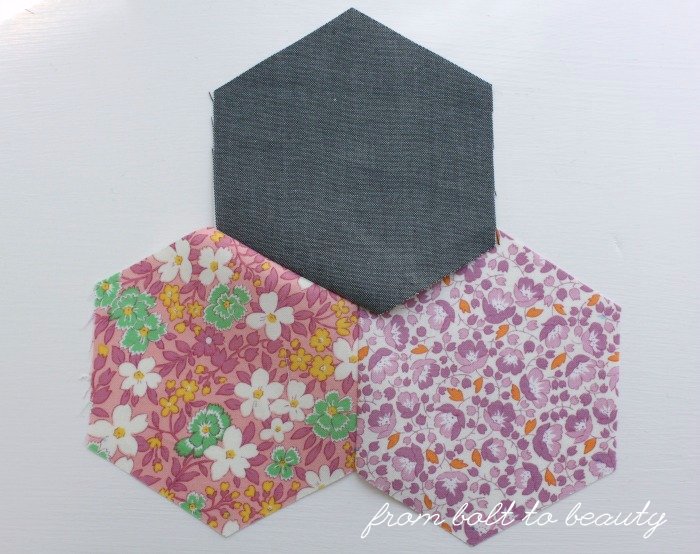
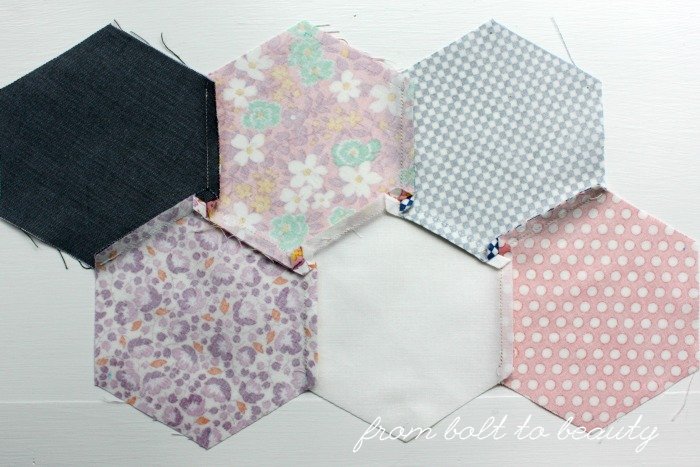
5. Sew the second seam—again, sewing from one mark to the other and not pressing the seam when you’re done. Now your trio will look like this ...
6. The final seam is sewn exactly like the second one. Pin as needed to avoid sewing through a seam allowance. You can see how I fold my fabric, finger-pressing my seams as I go, to get those seams out of the way ...
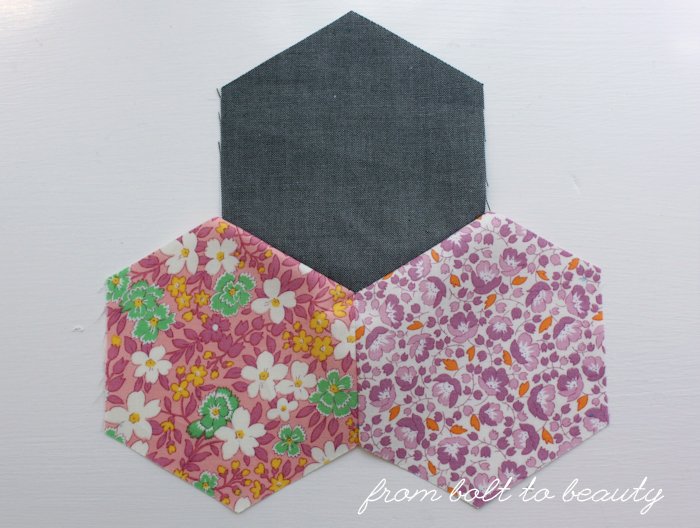
7. Your finished trio of hexagons will look like this. Please note: I pressed my seams for the sake of the picture, but it’s best to wait until later to press.
(Update: With the second quilt I made using this tutorial, I didn’t wait to press my seams, and when I did press them, I pressed them open. Everything worked out just fine with that method. Choose whichever way makes you happiest!)
Sew Your Groups of Three Together
You’ll follow the same principles to sew two trios together ...
Sew one seam at a time, without pressing the seams, and pin as necessary to avoid those seam allowances.
Piece the Top in Chunks
Even though you’re sewing manageable trios instead of columns, at some point you will need to deal with large swaths of hexagons.
My hexagon project was a small baby quilt, about 31 inches square, and I opted to sew the quilt in quadrants and then sew those quadrants together. There was nothing precise about how I divided up the blocks, though. I just kept sewing until all my groups of three (or random singles, because there were a few of those by the end) were used up. My sections ended up looking pretty random, more like blobs than quadrants ...
Divide up your quilt top in whatever way works for you. It may help to take a few pictures of your layout with your phone. That reference will ensure you don’t sew anything incorrectly!
Press Your Seams
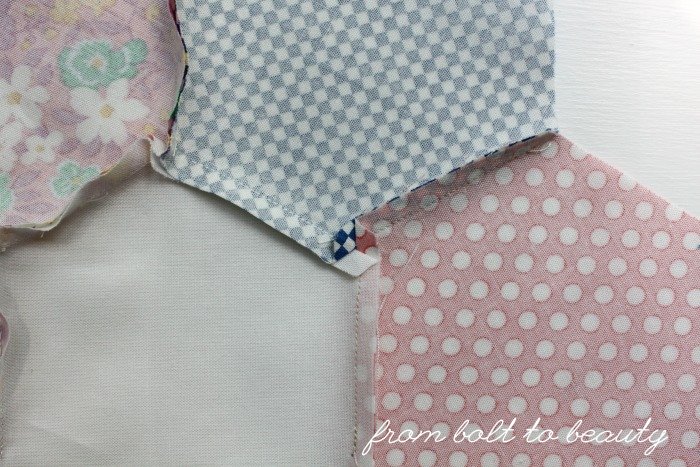
At this stage, you can press your seams. (See my update, above, for an alternative approach.) Start with the intersection of any trio of hexagons, and press the seams to one side. In the picture below, I pressed the seams counterclockwise around the intersection, but I could have just as easily pressed them clockwise.
The way that first intersection is pressed affects the intersections adjacent to it, as you can see in the next picture. The two top intersections are pressed clockwise, and the bottom two are pressed counterclockwise.
Remember that you are working with many bias edges. Try not to distort the fabric as you press.
Continue until you have pressed the entire quilt top.
Finish Your Quilt
With all the seams press, you can trim your quilt top and complete your project.
I think the key to a positive hexagon-piecing experience is patience and precision. Start small, with a baby quilt like I made, to see whether machine-piecing hexagons is for you. If you give the technique a shot and have any thoughts on fine-tuning the process, please share in the comments. Thanks!
To read more about the finished hexagon quilt, click here.
Linking up to
Let’s Bee Social,
Needle and Thread Thursday,
Tips and Tutorials Tuesday, and
Finish It Up Friday ...